

How To Use Vector Crop Tool In Affinity Designer
Cropping in Adobe Illustrator seems to be a bit of a confusing topic.
We're not surprised, especially since veteran Adobe users know just how recently the cropping option had been added to their roaster of features. Especially when working with raster graphics, designers used to have to switch between Adobe Illustrator and Photoshop in order to crop. But not anymore.
In this article, we'll take you on a journey explaining the different cropping options Illustrator offers. We'll also explain the difference between cropping a raster (pixel-based) graphic and a vector.
And ultimately, we will showcase how other design softwares, like Vectornator, compete with Adobe Illustrator in providing an enjoyable cropping user experience. Are you feeling dazed and confused, or do you feel like you could've discovered how to crop without reading an entire article about it? Let's find out in this step-by-step tutorial, shall we?

Understanding what you want to achieve
When you're cropping, the basic goal you want to achieve is removing unwanted areas from a graphic. Usually, you'd want to crop in order to improve framing, isolate the subject matter from its background, fit graphics and textures to certain shapes, or change the aspect ratio of the original file. Just to name the most common few.
There are actually a couple of ways to get around it. Do you want to crop a raster or a vector graphic? Do you just want to simply show part of the graphic, without cutting anything (aka non-destructive cropping), or remove the trimmed parts forever (destructive cropping)?
You can use various methods depending on your needs. We'll explain everything below.
The difference between cropping a raster and a vector
Okay, one last thing before we get to the point. Cropping a raster is not the same process as cropping a vector. Remember the Photoshop / Illustrator combo we mentioned before - using Photoshop to crop images, and Illustrator to crop vectors? Pretty impractical if you ask us. But since Creative Cloud, Illustrator offers a simple crop tool as a way to alter raster images.
What you need to remember is that vectors offer a lot more freedom when cropped, as they continue to be editable. In contrast, raster images are cropped into a new shape that cannot be altered unless you crop again.
Many ways to crop an image
Cropping an image in Illustrator CC using the Crop button
As the title suggests, this is the easiest way to crop an image. But it's only available for Illustrator CC users.
Select your image with the Selection Tool. Then click the Crop Image button on the upper toolbar. Drag the corners/anchors to crop your image exactly the way you want (as long as what you want is a rectangle).
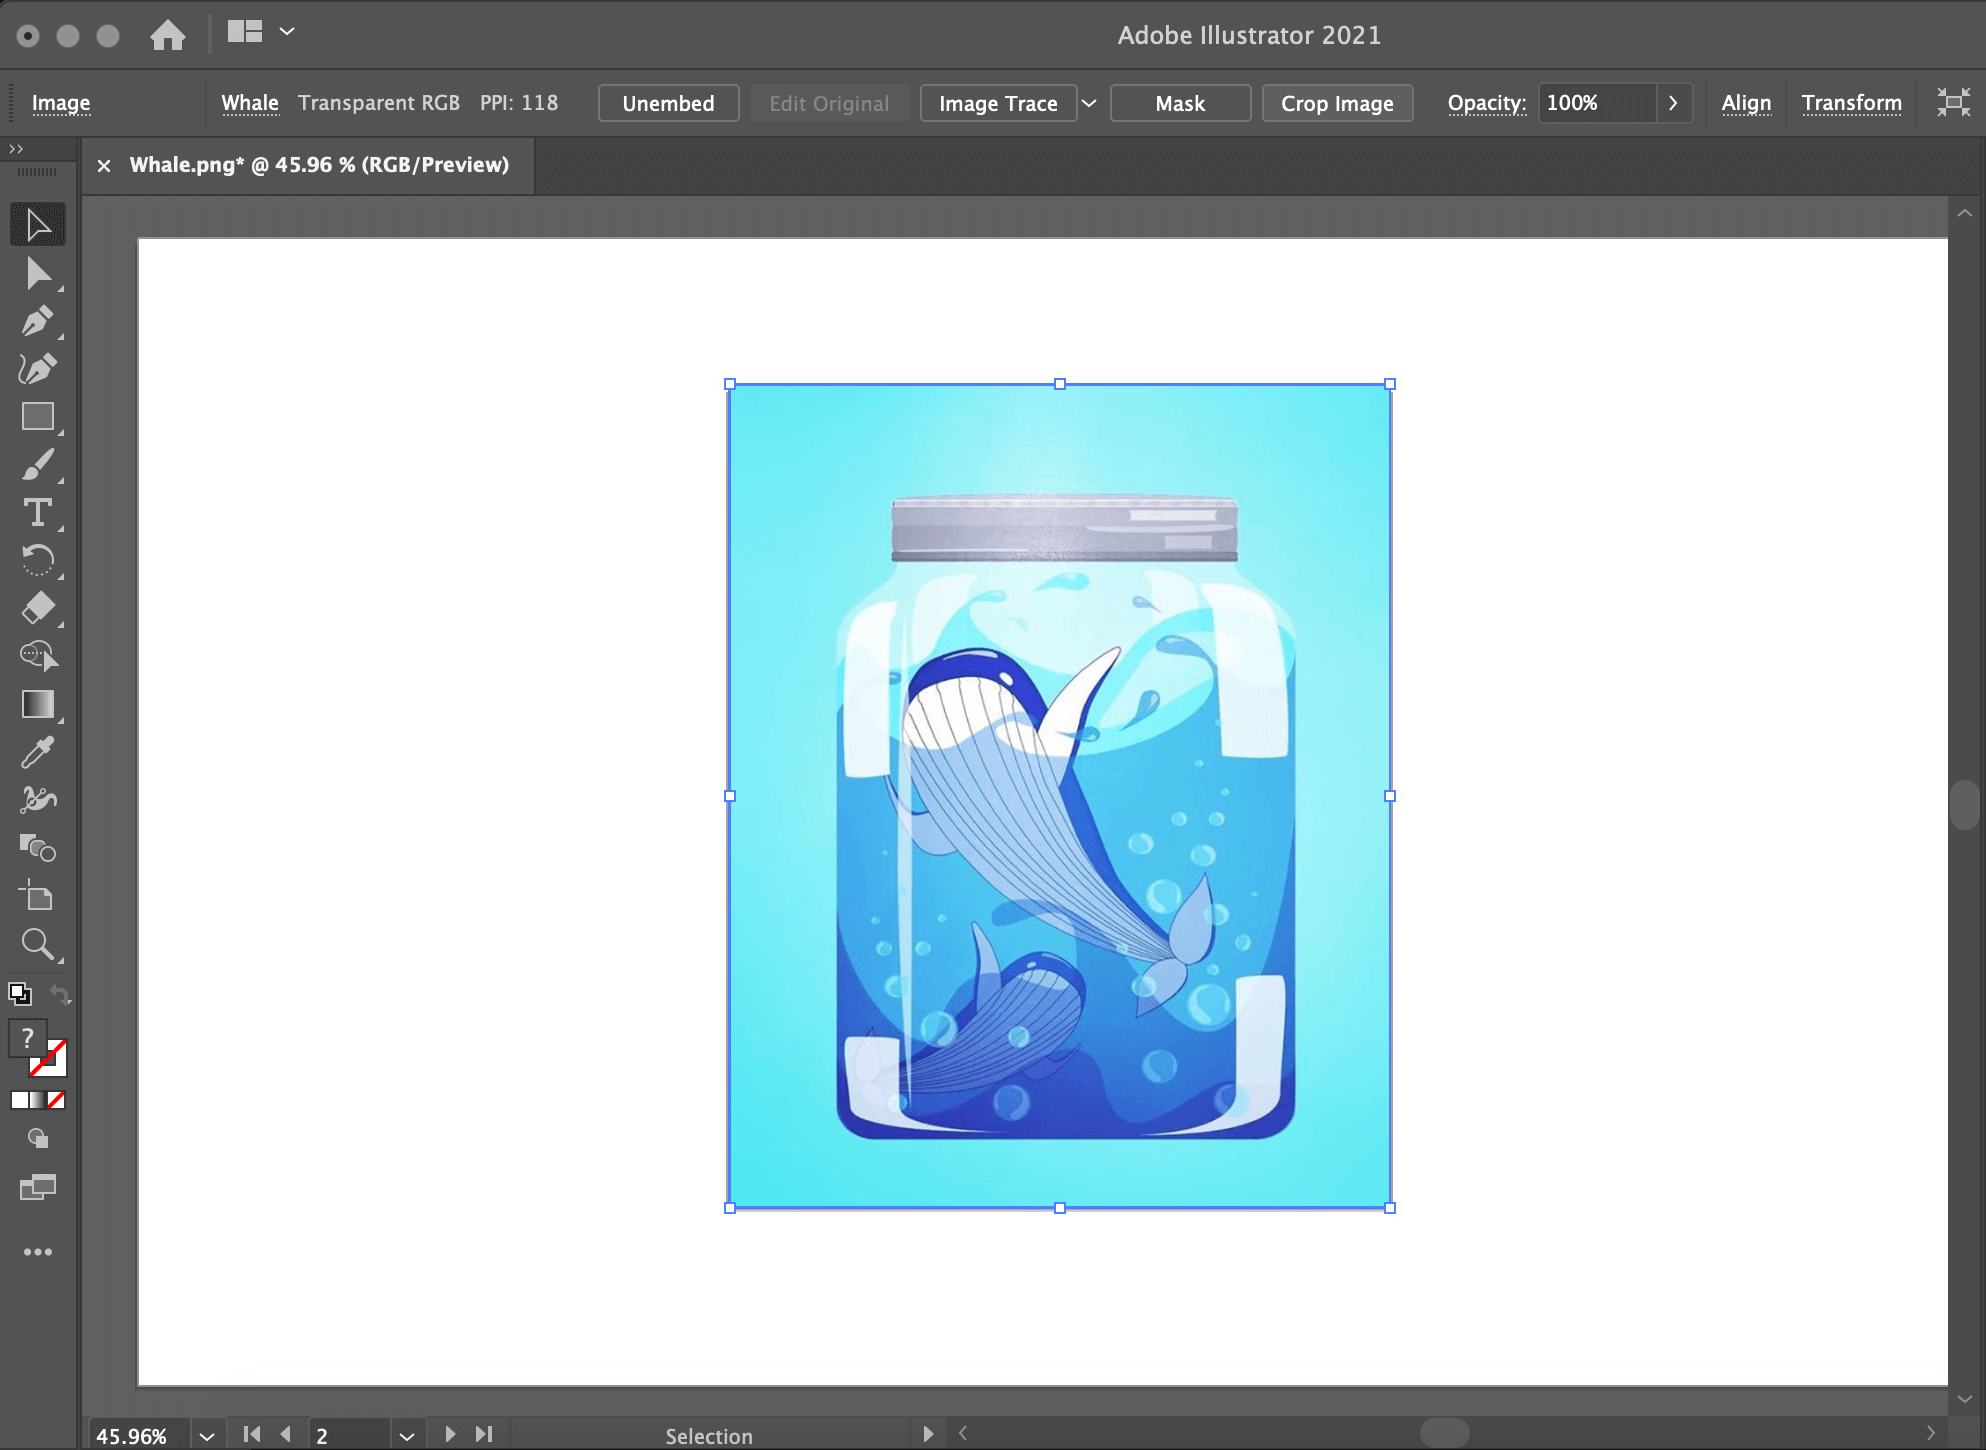
⚠️ Warning: this method is destructive, meaning that your cropped content will be forever lost.
The Crop Image option doesn't have a Keyboard Shortcut, but you can make one yourself. You can crop both linked images and embedded images using this method. To embed an image in Adobe Illustrator all you need to do is right-click on it, then press Embed.

Cropping a vector in Adobe Illustrator using the Crop function
Not as easy as the name suggests this time. If you want to crop a vector in a simple shape, you can also use their vector Crop tool, which is (for lack of a better word) hidden in the Pathfinder panel.
First, create your shape by using the rectangle or ellipse tool. Select both objects while making sure that the object you want to crop is underneath. Then go to Window -> Pathfinder and click Crop. The parts outside of the shape will be cropped destructively.

It's similar to a clipping mask (which we'll explain below). The only difference is that this method crops destructively, while a mask will not. That's why we really recommend using masks in all of your cropping ventures.
Cropping in Adobe Illustrator using a Clipping Mask
When cropping, masks are the going to your best friend, so it's worth paying extra attention here.
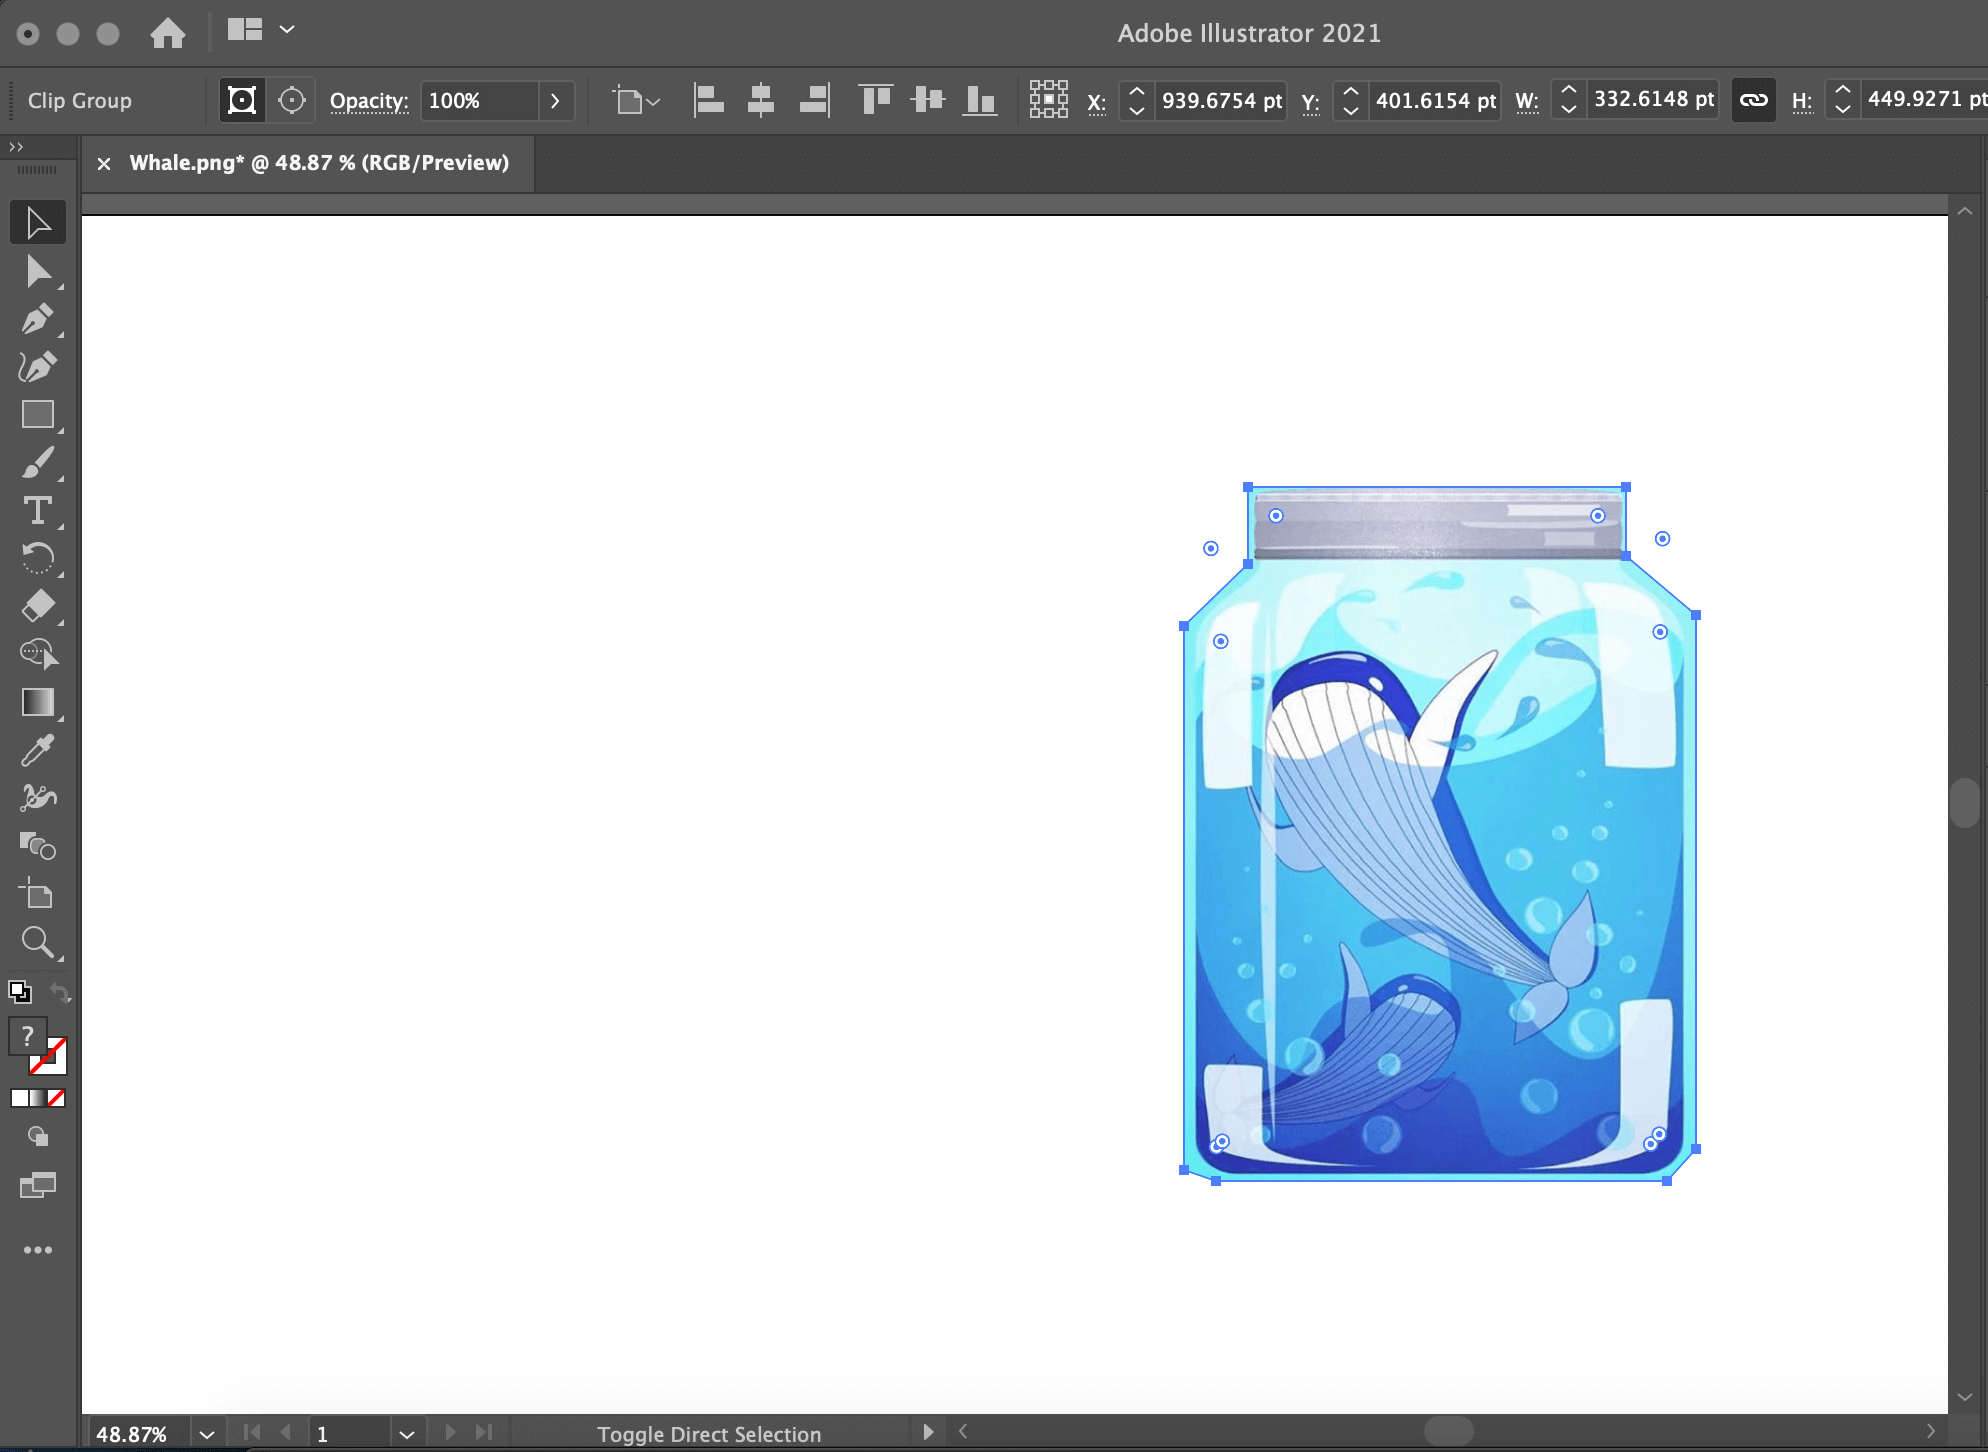
The greatest aspect of a clipping mask is that your images can be cropped into any shape you want. That's right. Anything from circles, diamonds, hexagons, the shape of a logo. A clipping mask can be anything.
Also, clipping masks are non-destructive and do not delete the unwanted area in a graphic. Instead, that part of the image is hidden. If your crop needs an adjustment, all you need to do is move the image below the clipping mask.
First, you have to create the shape in which you want to crop. This is also known as a clipping path. If you have the shape already simply add it to your canvas on top of the object you want to crop.

Now it's time to make the clipping mask. For that, make sure both graphics are selected.
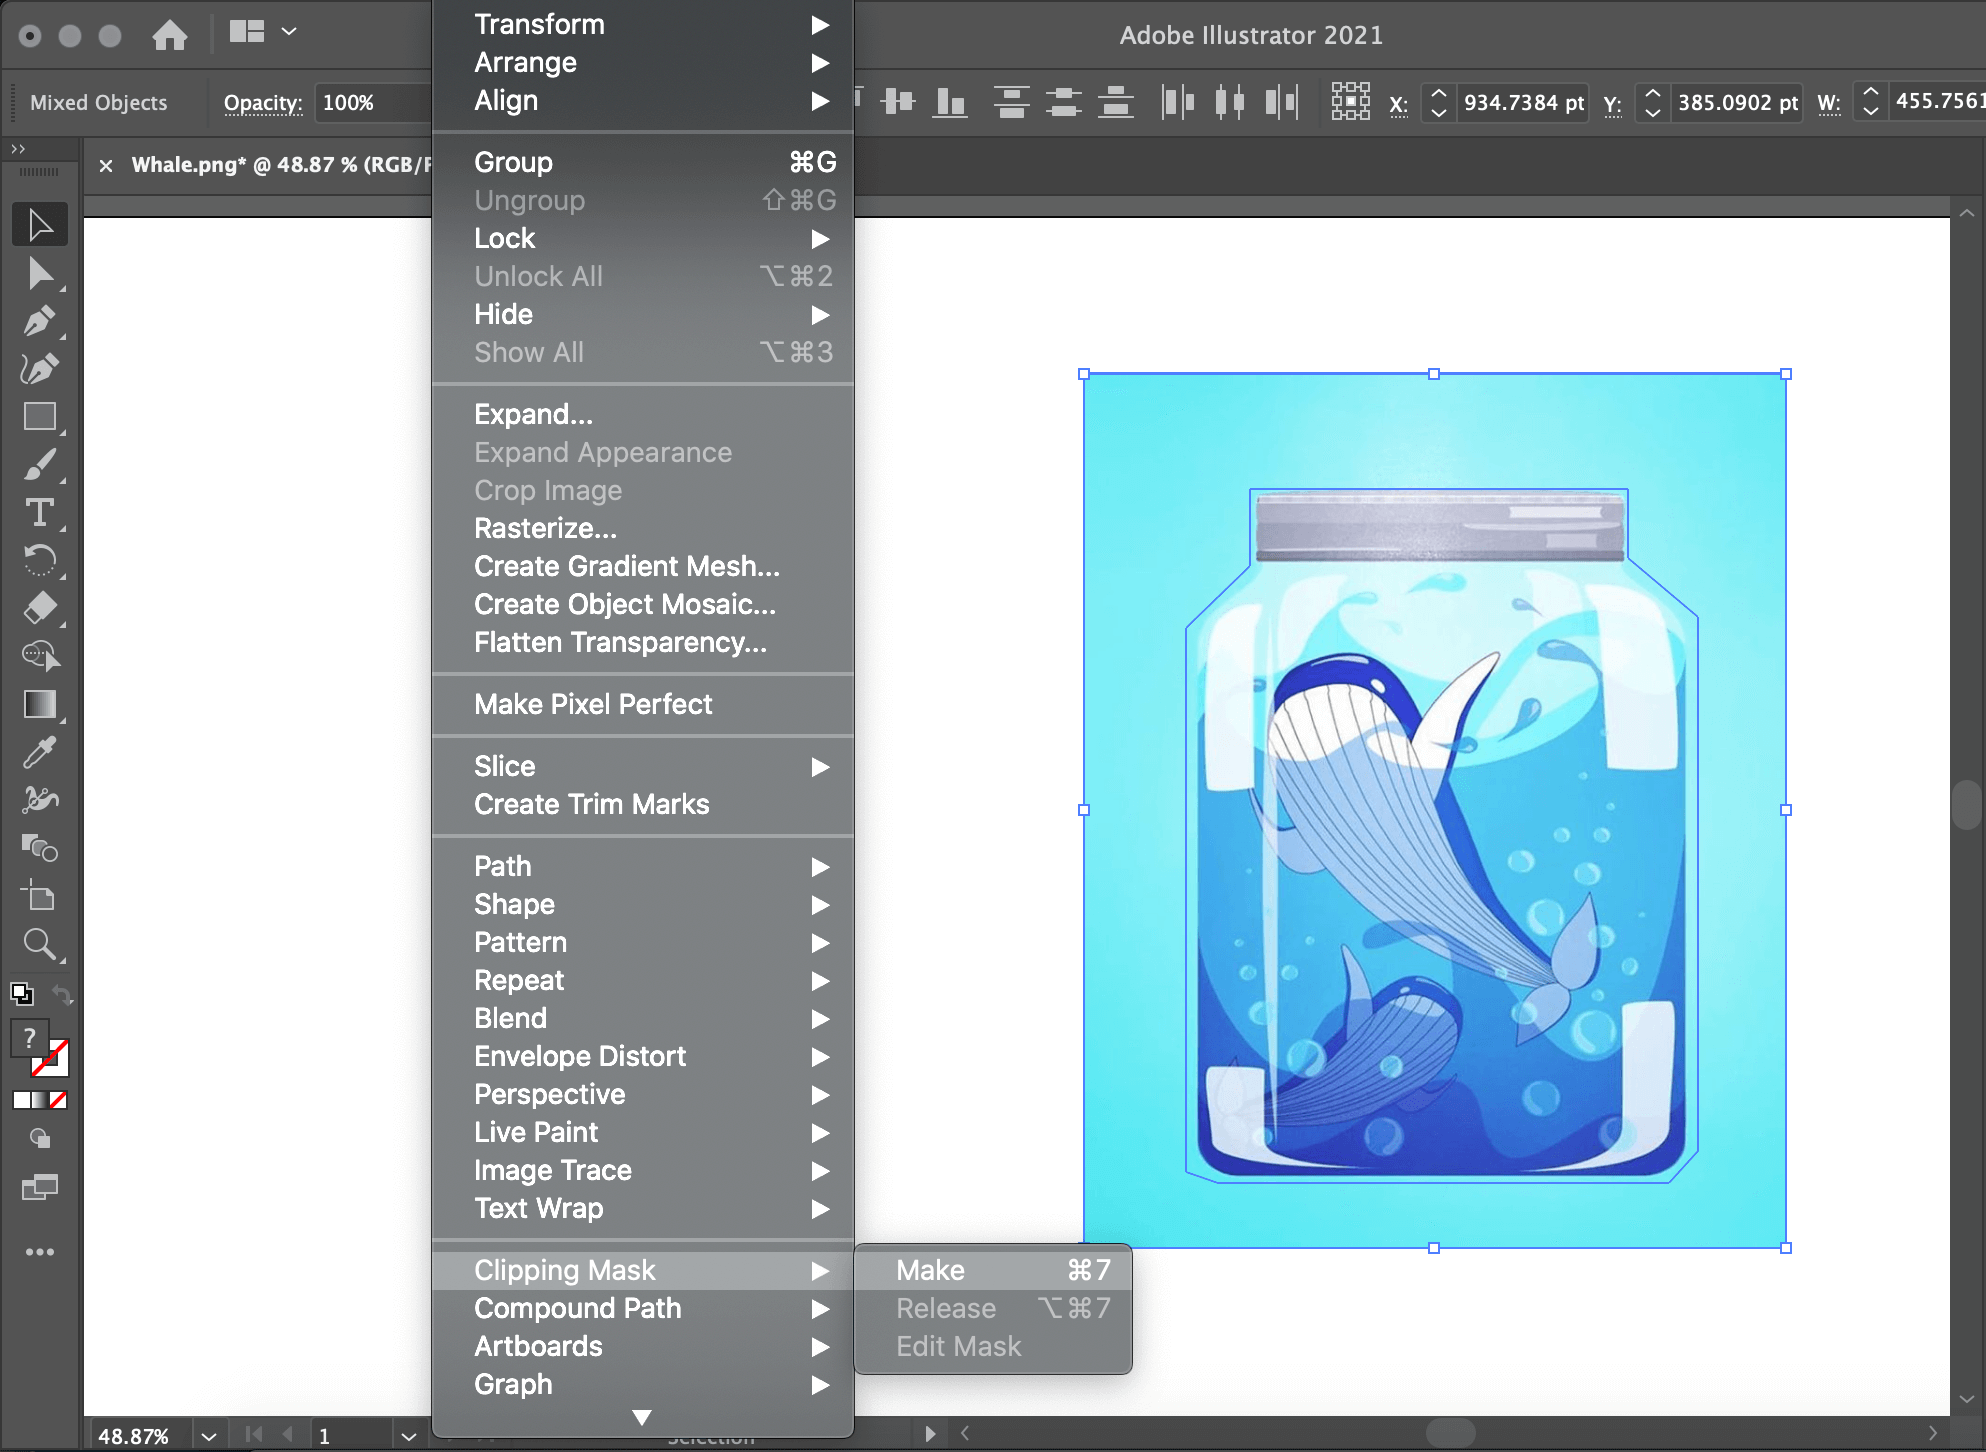
Then Click Object -> Clipping Mask. Boom. Now you can see your cropped image.
Be mindful that the order of the objects is very important. The object on top will become the clipping path for the object underneath.
Cropping in Adobe Illustrator using an Opacity Masks
A similar outcome can be achieved with Opacity masks.
First, draw the shape in which you want to crop your image (or add a pre-existing shape to your canvas) and color it black or white. In opacity masks, white means that the image will be opaque in that area. While black means that the image will be completely transparent. Grays indicate a fade from opaque to transparent or a gradient.

For this example, we'll use basic whites so the object is simply cropped. Select both the image and the shape. To create the opacity mask go to Window -> Transparency. A new panel will appear. There you will have to click Make Mask, but be sure the Clip box is checked.

Crop quick & dirty with artboards
To crop an image in Illustrator you can also go for the quick and dirty artboard alternative. This will only work with rectangular crops, of course. But it's non-destructive. Your graphic is still pretty much whole on the page, just outside the edges on the Artboard.
The method is very simple. Click on the Artboard icon and change its shape to the area you want to crop. Then export the file! By going to File -> Export As, and in the dialog box check Use Artboard for the export. Done.
Pro tip: if you want to preserve your transparent background, always export as .PNG and not JPEG.

Cropping to an aspect ratio
Let's say you want to crop a graphic to focus more on your subject, but you want to keep the aspect ratio the same as the original image, an oh-so-common task in graphic design, especially for digital marketing purposes.
The process is in reality much simpler than it sounds. Create a shape that covers the entire size of your graphic using the rectangle tool. Then resize it by holding the Shift key. This will guarantee that the aspect ratio is maintained. That's it.
Move the shape in your desired position and simply apply a Clipping Mask to it.

Vectornator vs Illustrator
Vectornator is also a vector-based tool.
But Vectornator and Illustrator could not look any more different. Adobe is known for its cluttered interface, a lot of "hidden" functions, and the fact that you really need to be trained in the tool in order to properly use it. As a medium-level user, you still might find yourself constantly Googling how to achieve different things when really, your mind should be fully focused on designing.
When a design tool needs so many bells and whistles in order for it to be functional at a minimalistic level, something needs to change. The designers of today cannot be bothered. And they shouldn't be.
In Vectornator you can crop very easily with a mask - which we've seen before that it's really the best way to alter the size or shape of any graphics. Because 1. it's non-destructive; 2. you have full freedom of moving around the original graphic once the operation has been done; 3. the resulting shape is still a vector that you can continue altering as you wish.
Once you open Vectornator you are greeted by a clean interface, no upper Toolbar, no clutter, no noise, and no plugins needed. This can save you hours and hours in your creative workflow. Plus, Vectornator has a very flat learning curve, and if you try it out for yourself, you will find it much easier to learn than Adobe Illustrator.
How to crop in Vectornator
Any type of closed shape can be turned into a clipping mask.
Now to crop an object, you first need to put the clipping mask on top of it, in the position you want. No worries, after cropping, you will still be able to make edits. Select both the object and the clipping mask with our Multi Selection Tool on the left. Then, tap the Mask button inside the Path Tab on the right or use the Quick Actions on your iPad.
The best part about the process (something that other design tools do not offer) is that a subtle <key>M<key>will appear next to the masked object. That's not going to be part of your design, of course! It is simply there to indicate that the object selected is under a mask. Useful, right?
If you want to edit the mask, simply double-tap (On iPad) or double-click (on Mac). Edit as much as you want. To exit editing double-tap (double-click) again. You can even import an Illustrator file into Vectornator and work with it from there.
To learn more about masking, and many other vector operations in Vectornator, head out to our Learning Hub section, where we explain them in detail ->
How To Use Vector Crop Tool In Affinity Designer
Source: https://www.vectornator.io/design-tips/how-to-crop-in-illustrator
Posted by: brooksanction.blogspot.com
0 Response to "How To Use Vector Crop Tool In Affinity Designer"
Post a Comment